31 January 2013
(Raspberry Pi + Ruby on Rails + Heroku) * Students = Awesome

by Bill Barnett
Background
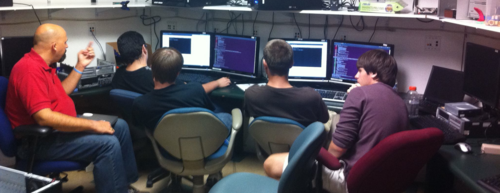
Over the course of the past two school years, my colleague Rob
Biedenharn and I have been working with Tom
“Coach” Brinkmann’s students at Little
Miami High
School,
attempting to teach them Web development using Ruby on Rails to aid in their
participation in Business Professionals of America
competitions and to provide them with skills very much in demand locally.
We supplied the students with all the usual
links to facilitate self-
guided learning on Windows PCs but it quickly became evident that we were
facing two challenges:
-
Providing the students a development environment similar to what they will encounter in a professional setting.
-
Maintaining student engagement.
After much trial and error, constrained primarily by the school’s existing
Windows PC labs and no capital to change that fact, we were unable to avoid
the fact that there is no substitute for a Unix-based operating system for
hosting Rails projects.
Having a development environment that closely resembles the production
environment builds the developer’s competence and confidence in dealing with
production system administration issues. Arguably, apps deployed to
Heroku (a key component of the exercise below) are
hosted in anything but a typical Linux environment. Nevertheless, despite
Heroku’s best efforts (and we LOVE Heroku) most Rails apps running in the
wild are hosted on “traditional” Linuxes.
The ability to stand-up a development system for minimal cost was crucial to
overcoming the second constraint above. This fact has been proven recently as
more than 50 of Coach Brinkmann’s students, from Freshman to Seniors, created
and deployed at least one Rails app to Heroku, and most completed two or more.
Seeing an app run locally was interesting to the students. However deploying
it to the Web and sharing it with family, friends and classmates who entered
data from their computers and smart devices went far beyond interesting. The
Raspberry Pi running an Open Source operating system (Debian Linux in our
case) met that criteria perfectly.
Below is the exercise that was recently assigned to each of Coach Brinkmann’s
classes. Students were given 70 minutes of classroom time to complete it. Rob
and I made ourselves available for assistance two evenings, and Rob went in
once during normal school hours. At last report nearly all students had
successfully completed their demo app and most had created at least one other
app of their own design. The fact that several students had an aptitude for
creating Web apps was not lost on us.
Prerequisites
- You’ll need (to have access to) a Mac computer. If you’ve devised a mean of completing the steps below on a Windows PC then by all means email me! With minimal modification, you can run this demo from an existing Linux PC but as a Linux user we trust you to already know this! :)
- Basic knowledge about command line navigation in OSX or Linux will aid in comprehension of this guide.
- If you don’t already have one, you’ll need to sign up for a Heroku account.
Before We Begin…
If you don’t have a Pi, get
one! If you have one but
don’t have the operating system installed, grab this image and follow these
instructions using a Mac or Linux computer that has an SD card reader embedded
or attached:
-
Insert a 16GB SD card in your Mac computer.
-
Download this disk image file.
-
Open a terminal window and change directory to the location into which you downloaded the disk image file above. Then expand the disk image file using this command:
```sh
gunzip rpi.img.gz
```
-
Enter this command to locate your SD card:
diskutil list -
Run the command below to unmount but not eject your SD card. Note that the question mark (?) is the disk number which will be specific to your system.
diskutil unmountDisk /dev/disk? -
Copy the disk image to your SD card by running the command below carefully substituting in the disk number obtained in the step above. Note that you will need run this command in the same directory where you downloaded and expanded the disk image file.
dd if=rpi.img bs=1m of=/dev/rdisk?
There! You’re all set to proceed.
SECURITY WARNING!!
The disk image above contains ssh public keys for both Rob and me. This
enables us to gain “emergency” access to a student’s system. If you do not
wish for Rob or me to have access to your system you will need to run the
following command on the system:
rm /home/pi/.ssh/authorized_keys
WARNING!!! If you’re going to mess up, here are the likely culprits!
- Your Pi needs Internet access to complete these tasks. Is the Ethernet cable plugged in?
- You’ll need to be patient! Don’t just start typing in commands and then hitting enter repeatedly. Wait for each command to finish running before proceeding.
- As an addendum to the previous tip, read the output returned after running each command and LOOK FOR ALL ERRORS.
- If there are errors, look for typos in the command you just entered. The last command you ran can be accessed by hitting the up arrow (ꜛ) key.
- Again, computers excel at reproducing errors. They’re junk in, junk out! Be careful you have entered each command exactly as it appears in the instructions below.
-
Get Pi & Login
Connect the Raspberry Pi to a monitor, keyboard, mouse, and network and plug
in the power.Username: pi Password: raspberryStart the GUI
startx -
Start Terminal Session
Double click the LXTerminal icon on the desktop to open the terminal window.
Enter the command below and look for the “Projects” directory.lsIf no “Projects” directory make one and change into it:
mkdir -p Projects -
Generate Skeleton Rails App
Enter the following command.
rails new grandchildrenSit back and watch the magic of Ruby-on-Rails as a new (but empty) project is
created in the Projects directory.cd grandchildrenDouble click the Chromium browser link on the desktop. Visit the address:
https://localhost:3000/. (This link will only work if
you’re reading these instructions on your Pi.)Once you’ve verified that the empty site displays properly (“Welcome aboard”
will appear at the top of the page) you need to stop the server by hitting
CTRL-C in the LXTerminal window. -
Generate Resources & Database
STOP! Type the following line on the command line BUT DO NOT hit
enter until the instructor or assistant has validated there are no errors/typos!rails generate scaffold Offspring name state children:integer grandchildren:integerNow run this command.
rake db:create db:migrateIF the migration fails, read the error message carefully. If you
can fix things, just redo the migration part as the database file will
already have been created.rake db:migrateRestart the server:
rails serverRefresh your browser. (And no change… but wait!)
-
User Experience!
Now visit: https://localhost:3000/offsprings
Enter a first record!
Enter your paternal grandparents’ last name, first name and the state in which
they had their kids. How many children did they have and how many
grandchildren do they have?After creating that offspring record, hit “Back” (the link, not the browser
button) to return to the list which now has one record.Then create the record for your maternal grandparents.
Now that you can see a couple records, let’s get this application ready to
deploy to the internet on Heroku. -
Preparing to Deploy to Heroku
Install the Heroku Toolbelt on your Pi. This takes a while so we will let it
run in a separate window as we edit some other files locally. After opening a
new LXTerminal window, run:wget -qO- https://toolbelt.heroku.com/install-ubuntu.sh | shThat’s “hyphen, Q, capital O, hyphen.”
-
Opening Emacs to Edit Files
There are just a few changes that need to be made in order to deploy your
application to the Heroku service.- The database locally is SQLite3, but Heroku only supports PostgreSQL.
- The default index.html file needs to be removed.
- The Offspring list should be the default page for the application.
Let’s take these one at a time.
Open Emacs (shortcut on the desktop) and choose “File » Open” and find the
“Gemfile” in the project root which is Projects/grandchildrenWhere you see the line:
gem 'sqlite3'We are going to change this to use SQLite3 in development and test
environments (which are local to your Raspberry Pi) and PostgreSQL on
production (which will be at Heroku).group :development, :test do gem sqlite3 end group :production do gem pg, require: false endWhen you’re done making your changes, save them by choosing “File » Save” from
the menu.We can’t build the pg gem on the Pi so we have to re-run the bundle install
avoiding production.IF you are in the wrong directory, change to the right one with:
cd ~/Projects/grandchildrenThen run this bundle command:
bundle install --without productionGo back to the command line and remove the index file.
rm public/index.htmlEdit Rails’ routing file using Emacs choosing “File » Open” and selecting the
“routes.rb” file within the config directory. Find the line:# root :to => 'welcome#index'Change it to:
root :to => 'offsprings#index'Note that there are two (2) changes:
- the ‘#’ at the beginning (which comments out the rest of the line) is
removed - ‘welcome’ is replaced with ‘offsprings’
-
To Heroku!
Replace the bold text below with your personal email address and name.
git init .
git config --global user.email "**you@example.com**"
git config --global user.name "**Your Name**"
heroku login
If you receive this message:
Could not find an existing public key.JUST HIT ENTER!
Then proceed with:
heroku apps:create --addons heroku-postgresql:devYou will receive a response similar to:
Creating desolate-eyrie-5848... done, stack is cedar
Adding heroku-postgresql:dev to desolate-eyrie-5848... done
https://desolate-eyrie-5848.herokuapp.com/ | git@heroku.com:desolate-eyrie-5848.git
Git remote heroku added
The output displays your application’s new URL, in the case above it is:
https://desolate-eyrie-5848.herokuapp.com/. Your application will have some other
name similar in format to “word-another-9999.”Next, commit your code (copy it up to your “production” site):
git add .
git commit -m "this is my first commit EVAR"
git push heroku master
heroku run rake db:migrate
heroku restart
Go to your bright shiny new Web app (the URL returned in the step above)!
-
Done? Logout and Shutdown!
Once you’ve entered some data in your new app and all the proper authorities
have inspected your app for correctness simply enter the following command in
the terminal window:sudo /sbin/shutdown -h nowWhen the screen is blank AND ONLY when the screen is blank you may disconnect
your power supply and remove your SD card.
Some troubleshooting tips:
After making a change to your code:
git commit -am "your commit message"
After every single change you make to the code on your local system you’ll
need to redeploy to Heroku:
git push heroku master
The app will be automatically (re)started so no need to run a separate ‘heroku
restart’ command like was needed when a migration was run.
The Nuclear Option!
If all else fails issue the command below and start again from Step #3:
cd ..
rm -fr ~/Projects/grandchildren
Or a tactical strike to restart at Step #4:
rails destroy scaffold Offspring
If you run into problems with db:migrate or db:create, you can try this
command:
rake db:reset
This will attempt to recreate the database file but should that fail, simply
enter these two commands:
rm -f db/development.sqlite3 test.sqlite3
rake db:create db:migrate
Wrap-up
If you’re not the slightest bit curious about the magical commands you entered
completing this tutorial then you’re done. Just remember yes, I would like
fries with that. :)
However if you are curious then by all means I encourage you to fire up your Pi, login and explore. Your assignments are:
-
What is the purpose of this command?
man ls -
If there’s no manual entry for the
railscommand and I can userails --helpto get help for the rails command, what command can I use to determine which “version” of rails I’m currently running? -
What’s so special about the
rootuser?
Most of all, have fun and let Rob or
me know if we can be of any help!