16 October 2014
The Joy of SVG Animation
CSS animation specifications are still in working draft, which is to say, occasionally temperamental. But while there be dragons, I have a few tips to offer as you journey out and onward into the magical, scaling and lossless land of SVG animation. These are things I picked up while animating a few of the illustrations over on our Process page.
1. Making Your Illustration
Whether you’re crafting an illustration to play with in Adobe Illustrator, Sketch, or Inkscape, your end product will be transmuted into code. Thusly, you owe it to yourself to make things as streamlined as possible for snappy loading, which means combining forms that are the same color and act as one is beneficial.
Additionally, while masking within these SVGs can work, there are occasions when browsers will either disregard them entirely or transform them into Eldritch abominations. I recommend saving to be written in manually, where they’re serving as frames, and just breaking masked items down into simpler forms for others.

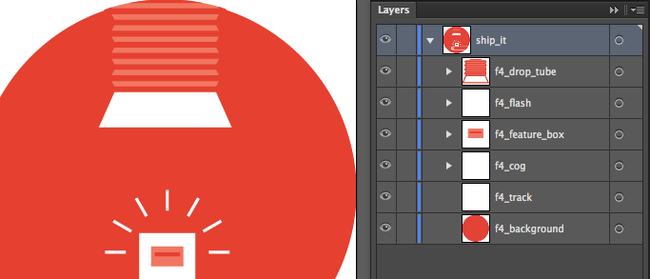
Once you’re content that everything is as tidy as possible, group any objects that will be moving together. When you export the file to SVG, these layer and object names will be transferred over as object ids for later targeting. In the case of the sample animation, the box, cog, and flash are going to be targeted, so they’re named accordingly.
2. SVG House Cleaning
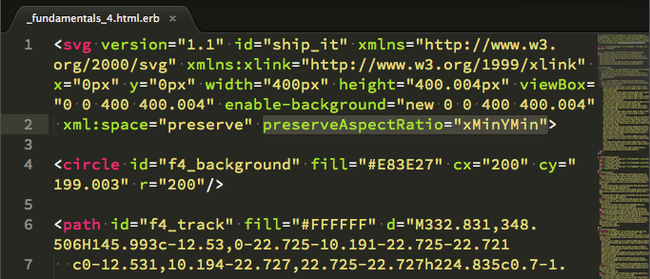
After grabbing your SVG code from the Illustrator save prompt or saving it out completely, open it up in the text editor of your choice. All of the tags sitting previous to the <svg> tag proper (including <xml> and <!DOCTYPE> tags) can be cropped out. In my experience, Illustrator has a way of mangling layer names involving underscores in the conversion process, so keep your eyes peeled for anything unexpected.
Also, to take advantage of preserving the scaling aspect of SVGs, adding preserveAspectRatio="xMinYMin" to the <svg> tag to prevent any funny business.

With the file prepped, it’s time for placement. The SVG can be placed as either an image or included directly in your markup, and the differences are pretty immaterial. My personal choice with the infographic on the Gaslight site was to load the individual SVGs onto the page proper using partials to keep layout markup from becoming nightmarish.
3. Just Add Motion!
Now, the moment you’ve all been waiting for — the actual animation. Your carefully named SVG groups and shapes can be directly targeted by your stylesheets, with specifications for the nature of the animation, as well as the specifics of the transformations.
Aspects like animation-name, animation-duration, animation-timing-function, animation-play-state, and animation-timing-count can be called out individually, or they can be bundled together in a single animation property. In the case of the feature falling out of the chute in my sample animation, here’s how I approached it:
svg#ship_it
  #f4_feature_box
    animation: featuredrop 1.4s ease-in infinite
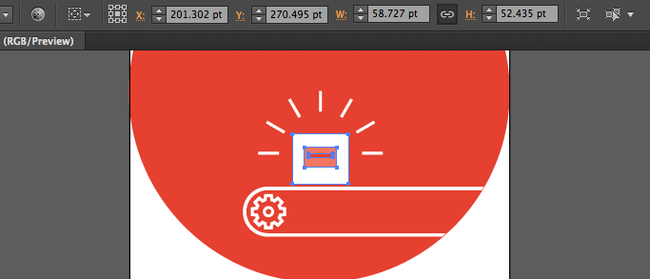
Objects getting the animation treatment will also need to have their origin specified. The figures you’re aiming for here are the coordinates of the center of the object, and you can easily pick them up from your SVG in the vector program of choice if you’re not feeling inclined toward the math.

svg#ship_it
  #f4_feature_box
    animation: featuredrop 1.4s ease-in infinite
    transform-origin: 201px 270px
And then the fun stuff–working out the animation itself:
@keyframes featuredrop
  0%
    transform: translateY(-300px)
  40%
    transform: translateY(0px)
  44%
    transform: translateY(-10px)
  50%
    transform: translateY(0px)
  100%
    transform: translateX(300px)
The code here entails a translation of the feature box upward before the animation begins, a drop to the original location with a small bounce, the feature box being carried off down the conveyor belt, and the precise timing of these events along the duration specified. When less precision is needed, such as in a transition, the approach used for the rotating gear would be appropriate:
@keyframes gearspin
  from
    transform: rotate(0deg)
  to
    transform: rotate(360deg)
That’s the overall gist of prepping SVG files and subsequently animating them. More advanced techniques exist for layering object transforms and masking, but the information outlined here can get you started.
You can check out the referenced animation on its own on Codepen and fork it if you want to start playing right away.


